The Zumo robot for Arduino is an Arduino-controllable tracked robot platform that is less than 10 cm × 10 cm—small enough to qualify for Mini Sumo. It includes two micro metal gearmotors coupled to a pair of silicone tracks, a stainless steel bulldozer-style blade, an array of six infrared reflectance sensors for line following or edge detection, a buzzer for simple sounds and music, and a 3-axis accelerometer, magnetometer, and gyro for detecting impacts and tracking orientation. Just add 4 AA batteries and an Arduino (or compatible controller) and you are ready to push! No soldering or assembly is required.
Overview
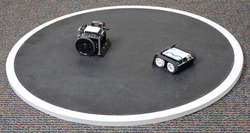 |
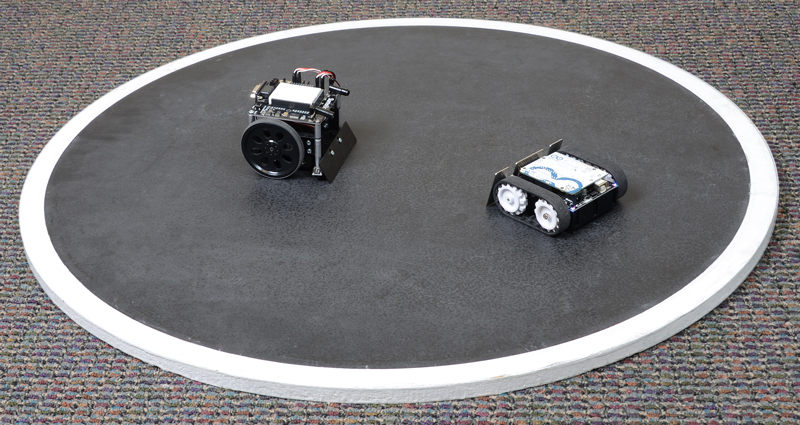
| A Zumo robot preparing to attack a Parallax SumoBot. |
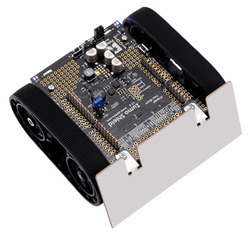 |
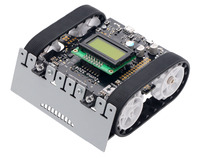
| Zumo Robot for Arduino, v1.2. |
This Zumo robot is a low-profile tracked robot platform intended for use with an Arduino (or compatible device, such as an A-Star 32U4 Prime) as its main controller. It measures less than 10 cm on each side and weighs approximately 300 g with an Arduino Uno and batteries (165 g without, as shipped), so it is both small enough and light enough to qualify for Mini-Sumo competitions. It uses two 75:1 HP micro metal gearmotors to drive the treads, providing plenty of torque and a top speed of approximately 2 feet per second (60 cm/s), which makes it much more agile than competing robots like the Solarbotics Sumovore and Parallax SumoBot while still offering plenty of control. The Zumo robot includes a 0.036″-thick laser-cut stainless steel sumo blade mounted to the front of the chassis for pushing around objects like other robots, and a reflectance sensor array mounted along the front edge of the Zumo (behind the sumo blade) allows the Zumo to detect features on the ground in front of it, such as lines for following or edges for avoiding.
The Zumo control board is essentially a shield for the A-Star 32U4 Prime, Arduino Uno or Arduino Leonardo, each of which can be plugged directly into the shield’s male header pins, face down. (It is not compatible with the Arduino Mega or Due, but it can be used with older Arduinos that have the same form factor as the Uno, such as the Duemilanove.) The shield includes dual motor drivers, a buzzer for playing simple sounds and music, a user pushbutton, and a 3-axis accelerometer, compass, and gyroscope for sensing impacts and tracking orientation. It also boosts the battery voltage to power the Arduino and breaks out the Arduino I/O lines, reset button, and user LED for convenient access and to accommodate additional sensors. The only difference between this and the previous Zumo Robot version is the use of a v1.2 Zumo shield in place of the previous shield version. This newer control board has a newer accelerometer/magnetometer module and adds a 3-axis gyroscope, but it is otherwise identical to the previous shield.
Our Zumo Arduino libraries make it easy to interface with all of the integrated hardware, and we provide a number of sample programs that show how to use the Zumo’s reflectance array, pushbutton, buzzer, and motors. We have also written a basic LSM303 Arduino library and L3G Arduino library that make it easier interface with the built-in LSM303D 3-axis accelerometer and magnetometer and L3GD20H 3-axis gyro.
The robot ships as shown in the main product picture; no assembly or soldering is required. An appropriate Arduino (or compatible controller) and four AA batteries are required but not included.
July 10, 2015 update: This robot now features black, spoked sprockets (see the main product picture) in place of the original white ones (which can still be seen in some of the pictures on this page).
Features
 |
 |
 |
- Integrated 75:1 HP micro metal gearmotors that offer a good blend of speed (up to 2 feet per second), power, and control.
- Mounted array of six IR reflectance sensors that allows the Zumo to detect contrasts in reflectivity directly beneath its blade, which can be used for following lines or detecting edges (e.g. the white outer area of a sumo ring or the edge of a table).
- Integrated DRV8835 dual motor drivers capable of delivering enough current for the Zumo’s two high-power gearmotors.
- Piezo buzzer for playing simple sounds and music. The buzzer is controlled by one of the Arduino’s PWM outputs, so tones can be generated in the background without taking up a lot of processing power.
- Integrated LSM303D 3-axis accelerometer and 3-axis magnetometer that can be used to detect impacts. The compass gets a lot of interference from the motors, batteries, PCB, and its surroundings, so it is not generally useful for precision navigation, but we have found that with proper calibration, it can be used for rough orientation measuring in many environments. This part is an upgrade over the LSM303DLHC accelerometer/magnetometer IC included on previous versions of the Zumo shield for Arduino.
- Integrated L3GD20H 3-axis gyroscope that can be used to track rotation. This is new on the v1.2 version of the Zumo shield; previous versions did not include a gyro. With this sensor and the LSM303D mentioned above, the shield effectively has a built-in MinIMU-9 v3 IMU module that can optionally be used to make a attitude and heading reference system (AHRS) so that your robot can its orientation.
- Optional user pushbutton on pin 12.
- 7.5 V boost regulator for powering the Arduino from the Zumo’s 4 AA batteries.
- Convenient access to Arduino I/O lines, the pin 13 user LED, and the Arduino reset line via the shield.
- General-purpose prototyping areas and an expansion area at the front for connecting additional sensors.
- Compatible with the Arduino Uno R3 and Arduino Leonardo. Can also be used with older Arduinos that have the same form factor, like the Duemilanove.
- Arduino libraries and sample code make getting started easy.
- Detailed user’s guide.
Required accessories (not included)
 |
| Arduino R3, top view. |
- An Arduino or compatible control board. The Zumo Shield works with the A-Star 32U4 Prime, Arduino Uno and Arduino Leonardo. It is not compatible with the Arduino Mega or Due, but it can be used with older Arduinos that have the same form factor as the Uno, such as the Duemilanove. (Other Arduino-compatible controllers might work with the Zumo robot, but support for them will be limited and they might require modification; for example, one customer got his Zumo robot working with the Freescale FRDM-KL25Z board.)
- Four AA batteries. The Zumo chassis works with both alkaline and NiMH batteries, though we recommend rechargeable NiMH cells.
Optional accessories
 |
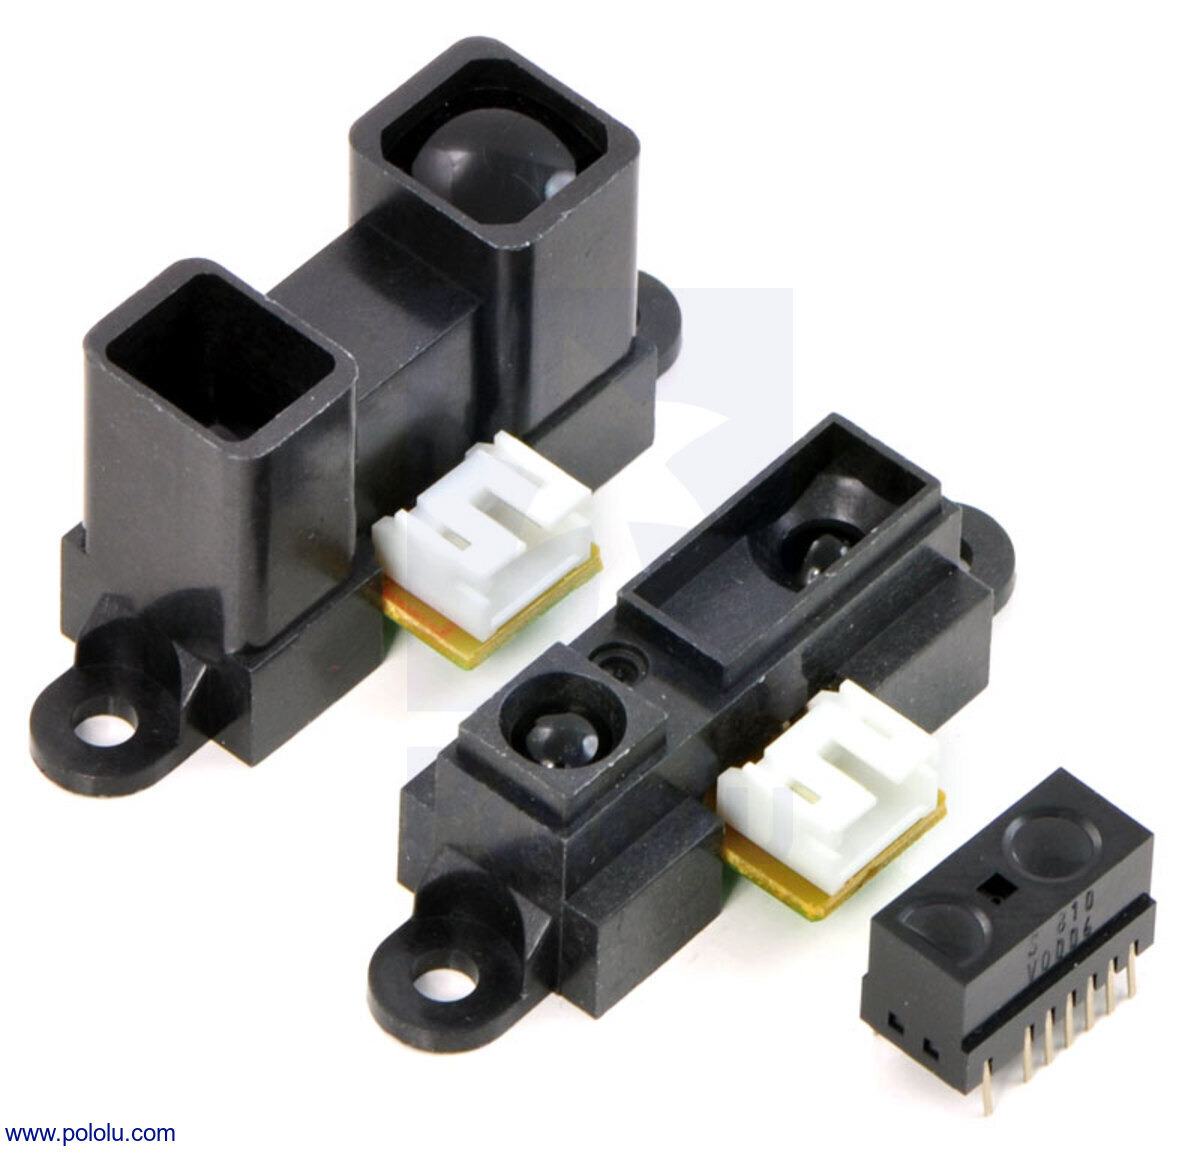
| A variety of Sharp distance sensors. |
- Optical rangefinders for obstacle/opponent detection. We carry both analog and digital rangefinders that detect at distances useful in regulation mini-sumo rings.
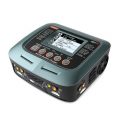
- iMAX-B6AC battery charger for charging the Zumo’s battery’s through the Zumo Shield’s 2-pin charge port. Note that you only need a battery charger if you plan on powering the Zumo with rechargeable cells, and that charger should be capable of charging 4 NiMH cells in series. Alternatively, since the Zumo just uses ordinary AA batteries, you can use AA chargers (into which you stick the individual cells) available at most general electronics stores.
- Connectors (headers, jumper wires, etc) for adding more sensors.
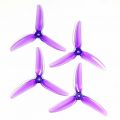
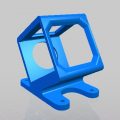
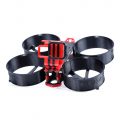
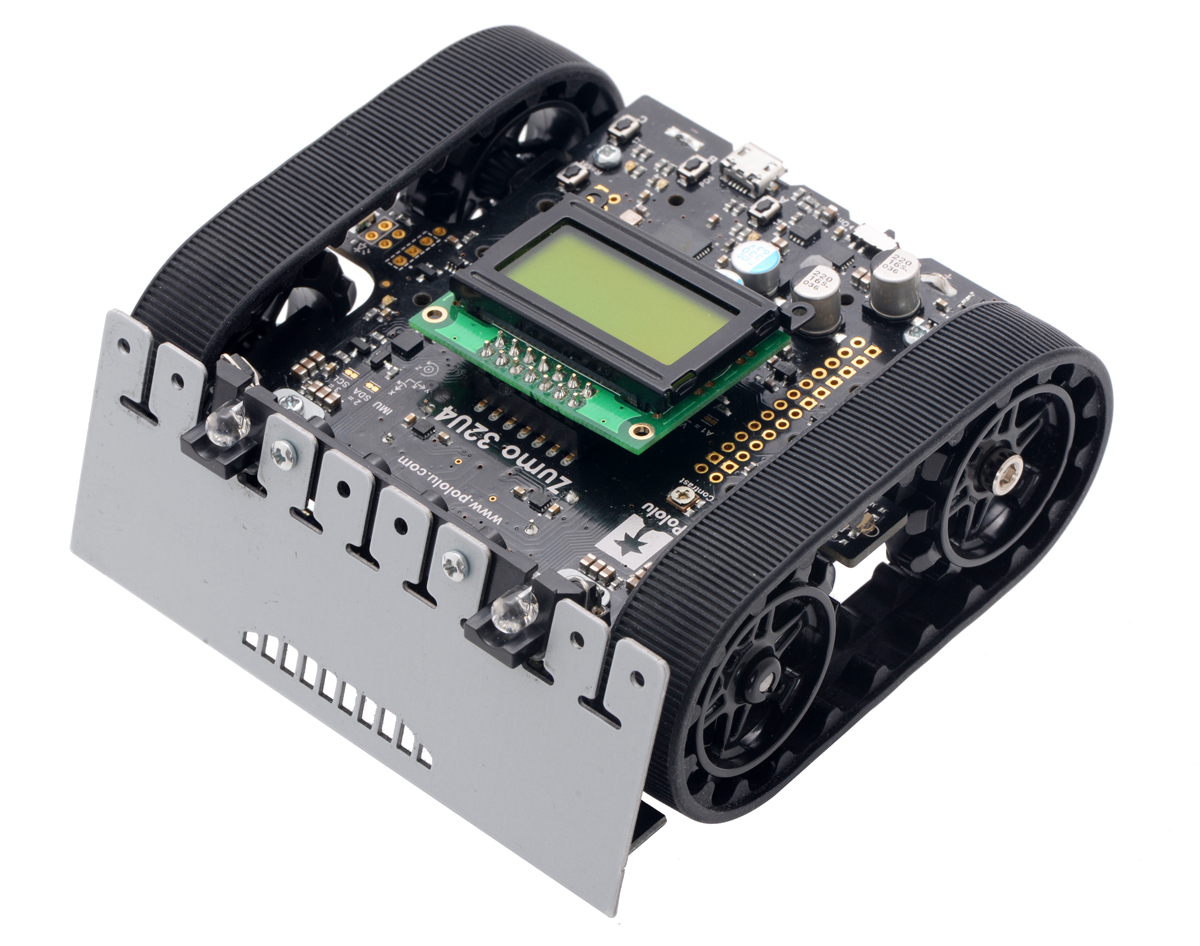
- Replacement sprockets in red or white. The Zumo robot for Arduino includes the black sprockets shown in the left picture below, but other colors can be purchased separately if you want to add a bit of personalization to your robot. The following pictures show the newer Zumo 32U4 Robot, which is based on the same Zumo chassis and therefore uses the same sprockets:
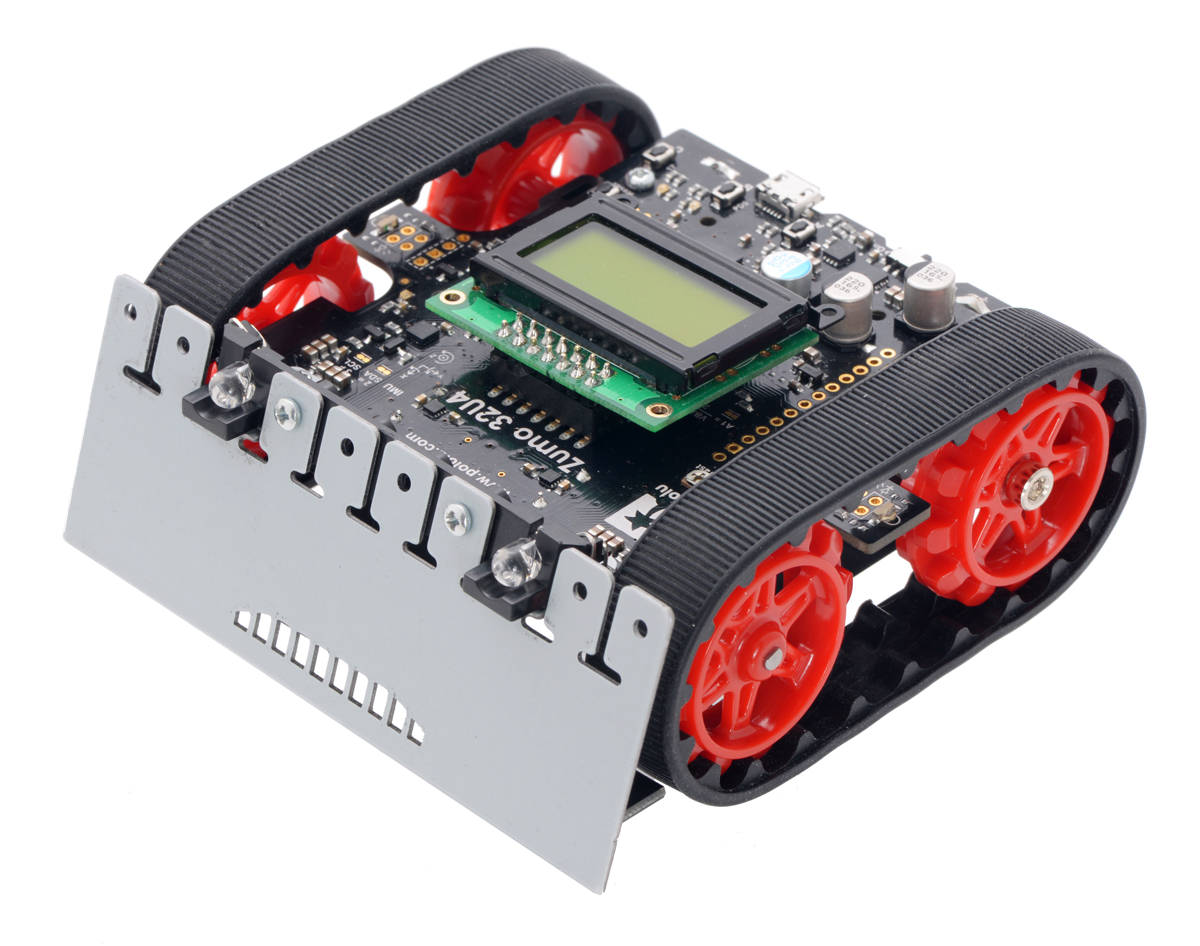
 |
| Zumo 32U4 robot with black sprockets. |
|
 |
| Zumo 32U4 robot with red sprockets. |
|
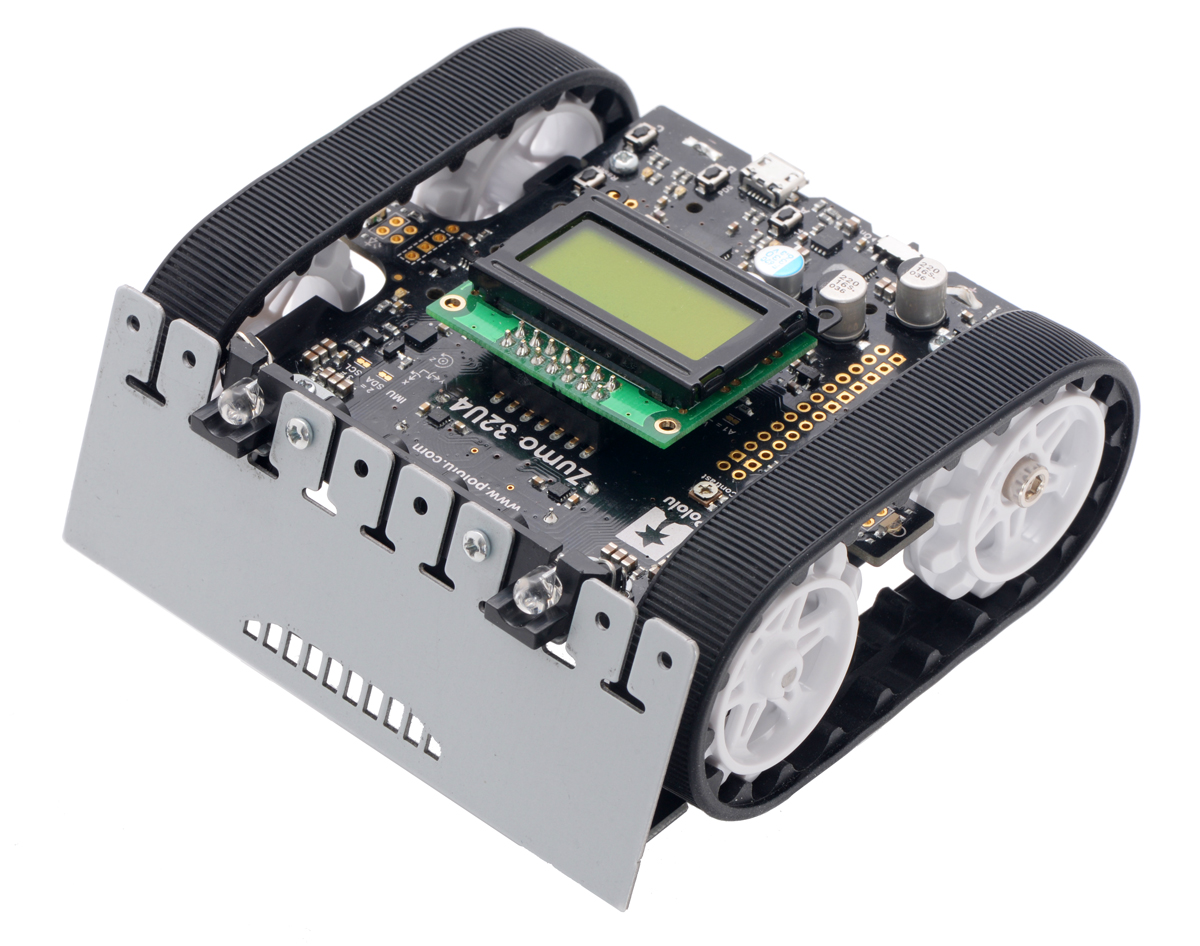
 |
| Zumo 32U4 robot with white sprockets. |
|
Also available as a kit
For those interested in soldering and assembling their own Zumo, the Zumo Robot Kit for Arduino, v1.2 contains the parts necessary to assemble your own Zumo robot, but allows you to select a different gear ratio micro metal gearmotor to make your Zumo faster or stronger. Note that unlike the assembled version, the kit does not include a Zumo reflectance sensor array.
 |
| Contents of the Zumo robot kit for Arduino, v1.2. |
Comparison with the Zumo 32U4 robot
The newer Zumo 32U4 is another robot based on the Zumo chassis. It is a more highly integrated robot than the Zumo robot for Arduino, with enhancements that include a built-in Arduino-compatible ATmega32U4 microcontroller (the same one used in the Arduino Leonardo and A-Star 32U4 boards), an LCD, encoders for closed-loop motor control, and proximity sensors for obstacle detection. The Zumo 32U4 main board effectively combines the functions of the Zumo Shield and the separate Arduino controller into a single, compact board that is just as easy to program as a standard Arduino or A-Star thanks to its USB interface and preloaded Arduino-compatible bootloader.
 |
| A Zumo 32U4 robot (left) and a Zumo robot for Arduino with an A-Star 32U4 Prime LV (right). |
Some of the pin mappings and software libraries differ between the Zumo 32U4 and Zumo robot for Arduino, so programs written for one robot generally need to be modified to work on the other.
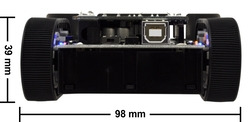
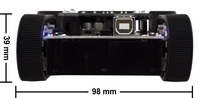
Dimensions
| Size: |
98mm × 98mm × 39mm1 |
| Weight: |
165 g2 |
Notes:
- 1
- with an Arduino Uno.
- 2
- without batteries and an Arduino (~300 g with batteries and an Arduino Uno).
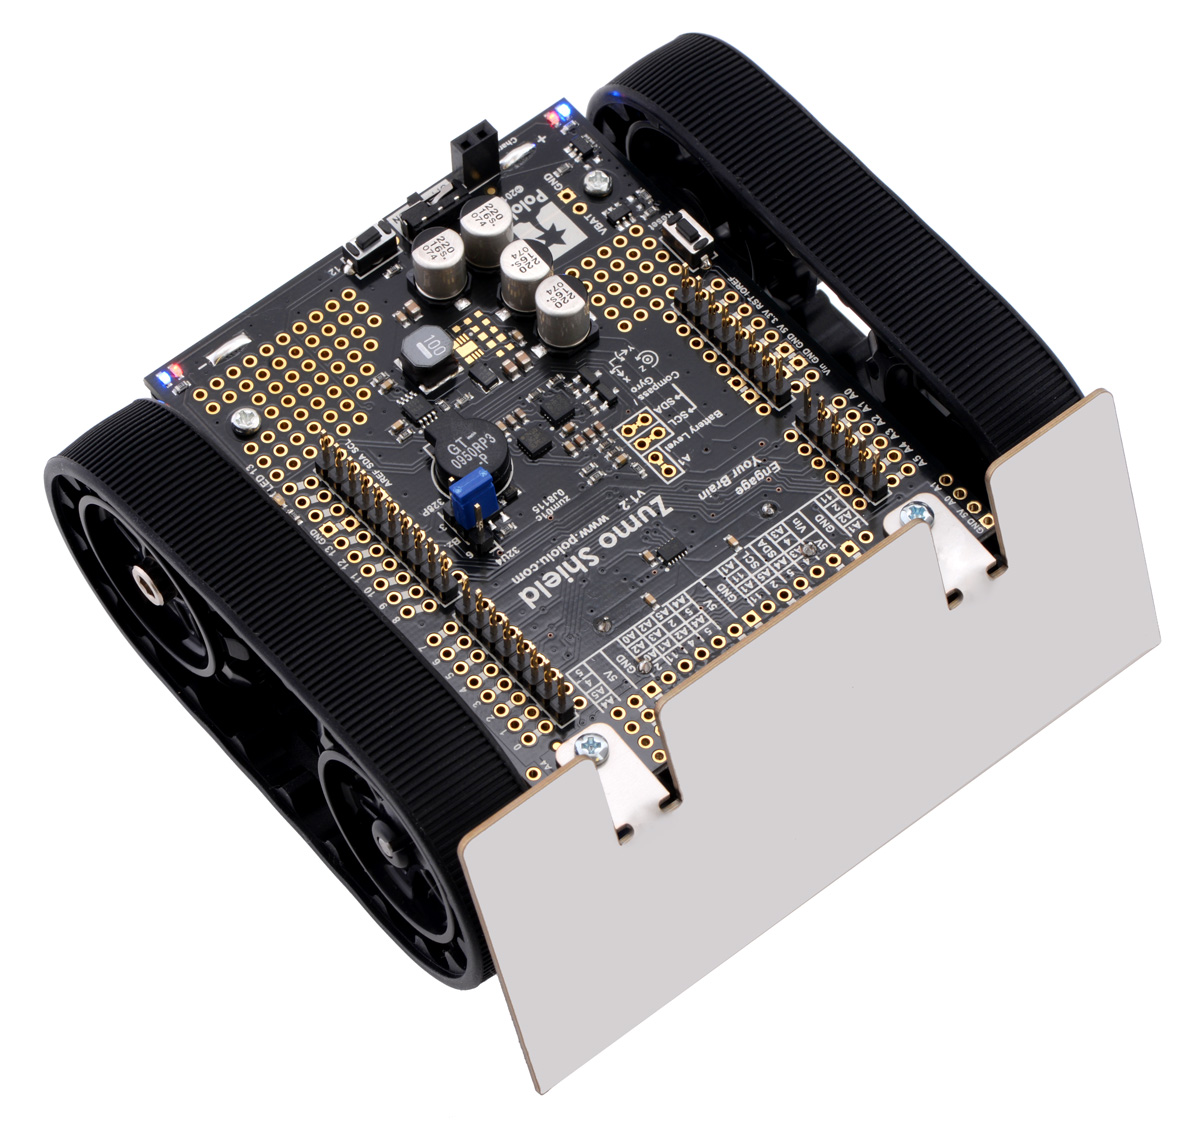
 |
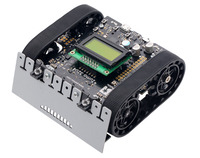
| Zumo Robot for Arduino, v1.2. |
 |
| Zumo Robot for Arduino, v1.2. |
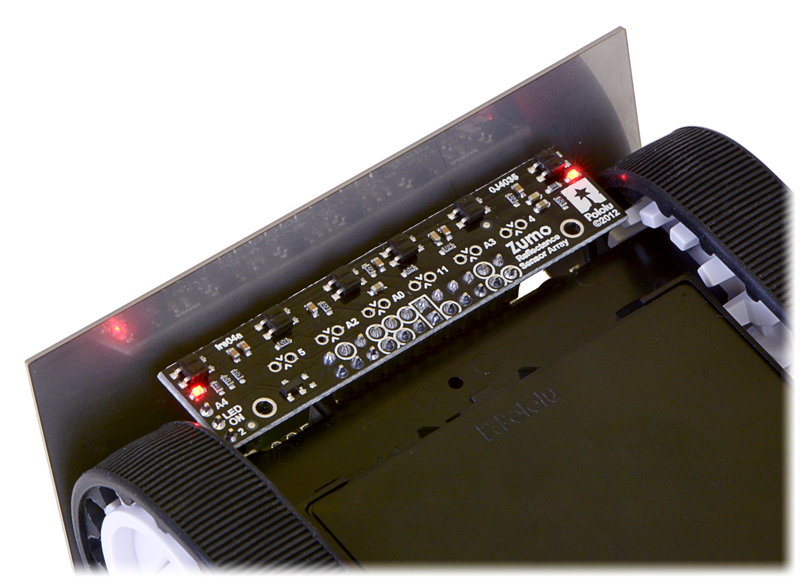
 |
| Zumo reflectance sensor array on a Zumo robot, bottom view. |
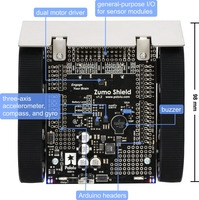 |
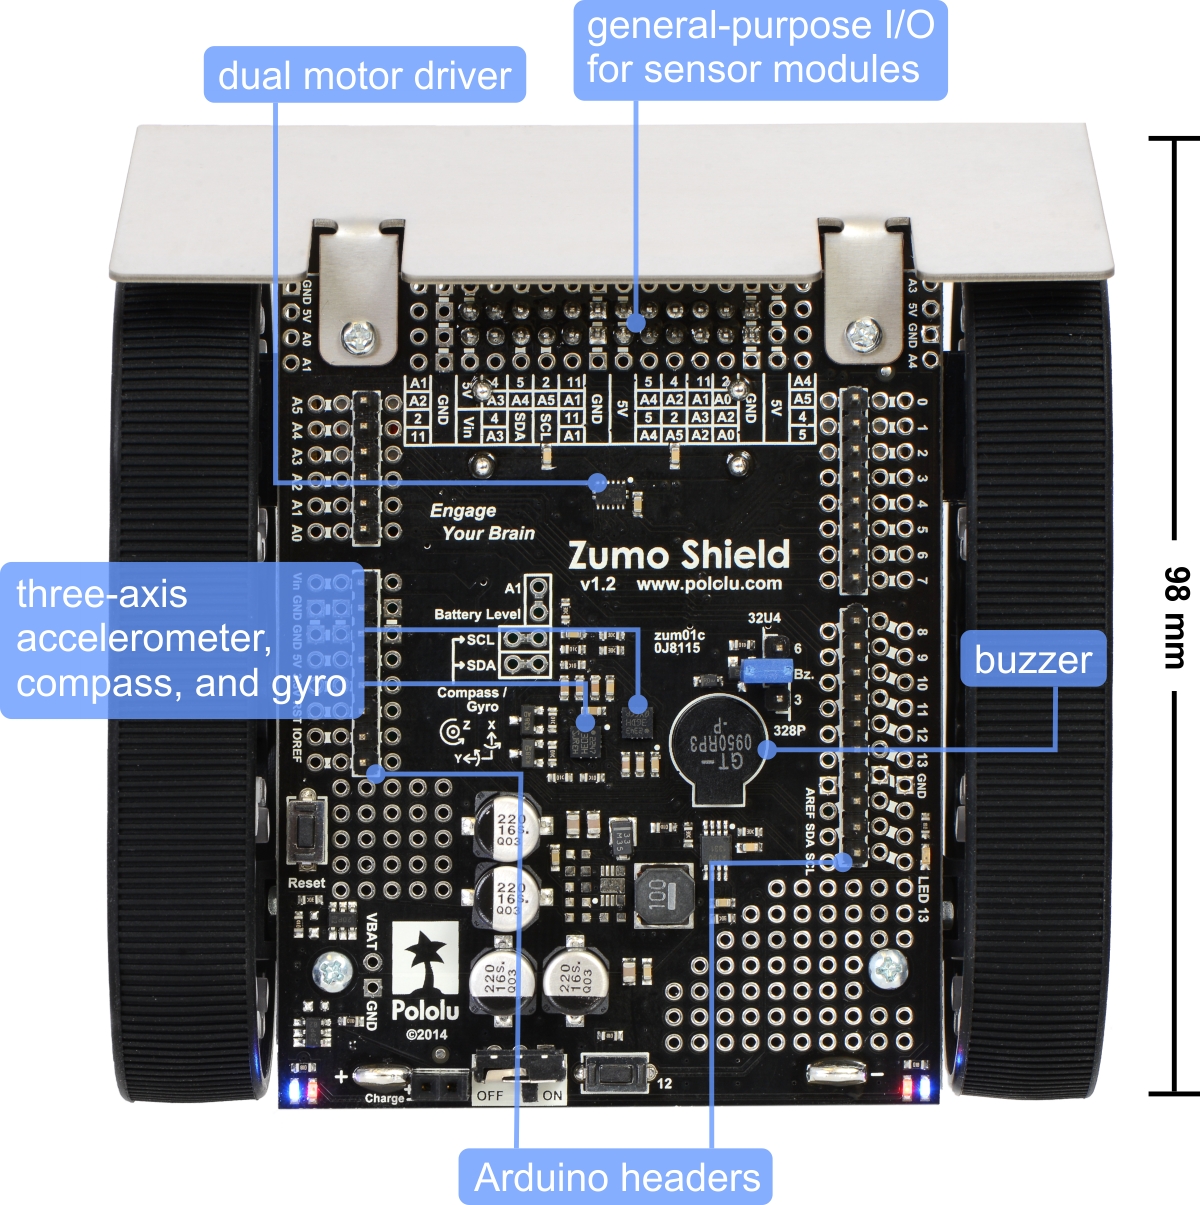
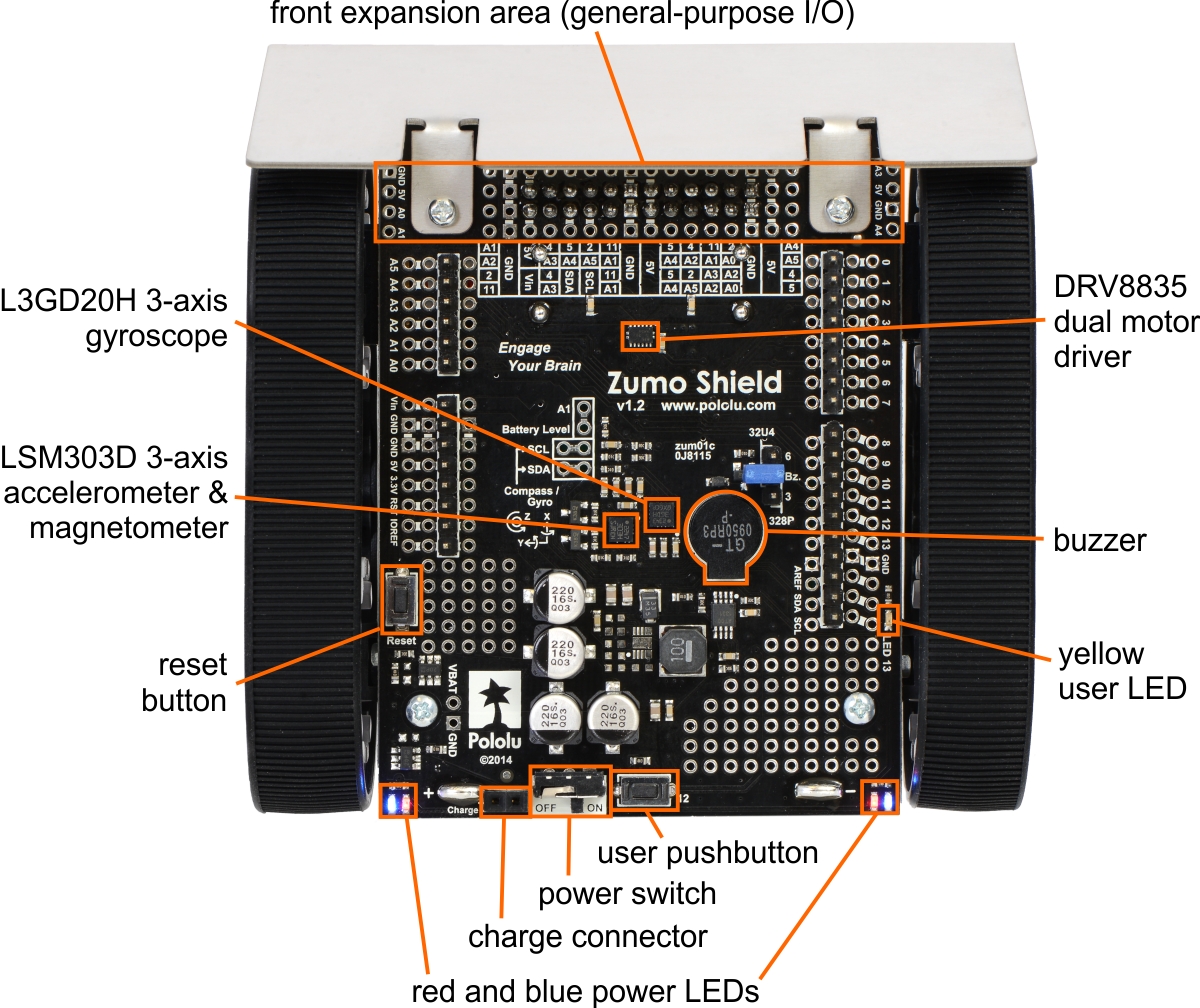
| Main features of the Zumo Shield for Arduino, v1.2. |
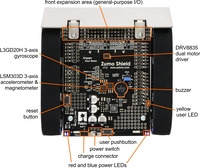 |
| Zumo Shield for Arduino, v1.2, top view with labeled components. |
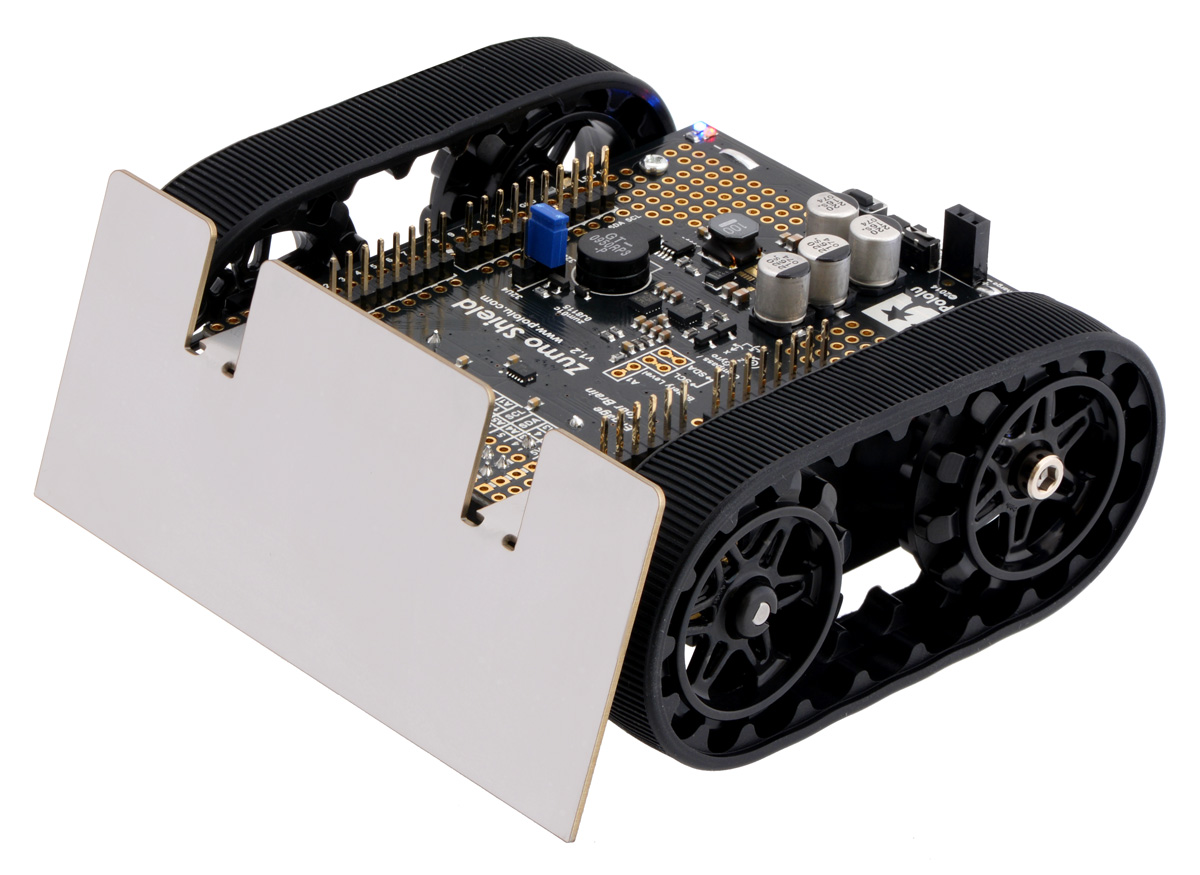
 |
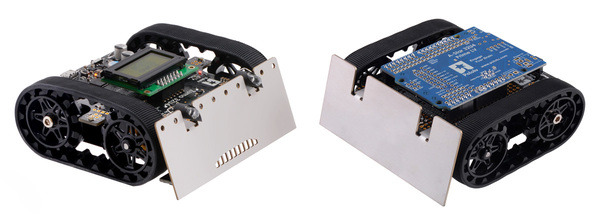
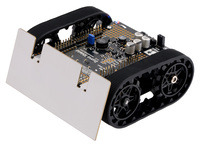
| Zumo robot assembled with a Zumo Shield and Arduino Uno, back view. |
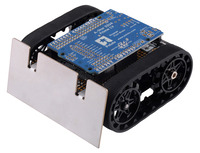 |
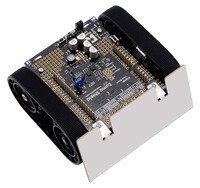
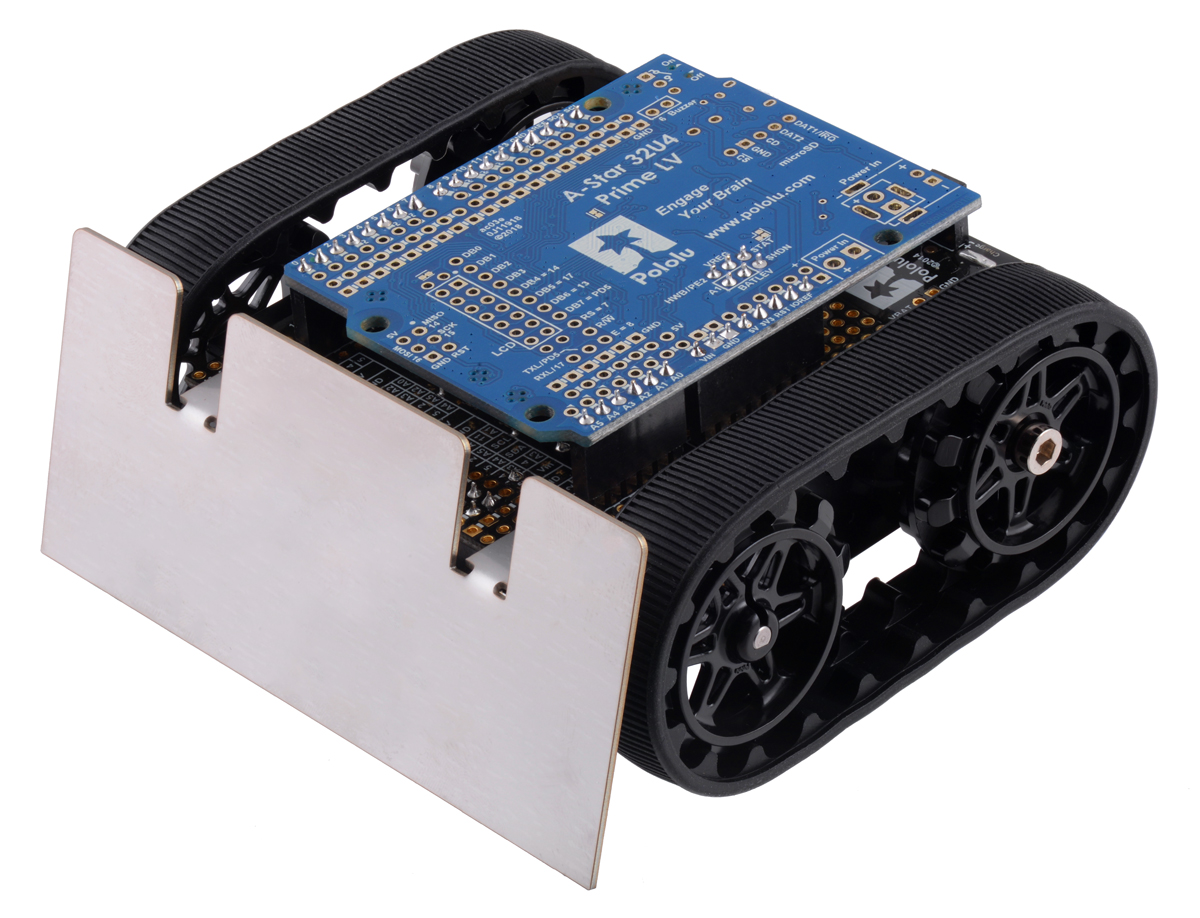
| Assembled Zumo Robot for Arduino with an Arduino-compatible A-Star 32U4 Prime LV. |
 |
| A Zumo 32U4 robot (left) and a Zumo robot for Arduino with an A-Star 32U4 Prime LV (right). |
Documentation and other information
Recommended links
- Zumo Shield Libraries
- This collection of libraries and examples for the Arduino that make it easy to program an Arduino-controlled robot built with Pololu’s Zumo Shield or Zumo robot kit (also available fully assembled).
- LSM303 Arduino library
- This is a library for the Arduino that interfaces with our LSM303D, LSM303DLHC, and LSM303DLM 3D compass and accelerometer carriers as well as the compass and accelerometer ICs on the MinIMU-9 v3 and AltIMU-10 v3 (it also works with older versions of those boards, some of which used the LSM303DLH and LSM303DLHC). It makes it simple to configure the device and read the raw accelerometer and magnetometer data, and it has a function for computing the tilt-compensated heading for those looking to use the LSM303 as a tilt-compensated compass.
- L3G Arduino library
- This is a library for the Arduino that interfaces with our L3GD20H and L3GD20 3-axis gyro carriers as well as the gyros on the MinIMU-9 v3 and AltIMU-10 v3 (it also works with older versions of those boards, some of which used the L3G4200D and the L3GD20). It makes it simple to configure the device and read the raw gyro data.
- Simulink Library for Zumo Robot
- This library can be used to program an Arduino-controlled Zumo through MATLAB and Simulink. It provides driver blocks for all the sensors present on the Zumo Robot as well as example models showing their usage.
- How to program a Zumo robot with Simulink
- This tutorial on the Adafruit Learning System guides you through the process of programming a Zumo robot with Simulink.
- Pixy Pet Robot tutorial: adding color vision to the Zumo Robot for Arduino with a Pixy CMUCam-5
- This tutorial from Adafruit shows how to pair a Pixy CMUCam-5 vision system with the Zumo Robot for Arduino to enable it to chase objects or follow you around.
- Zumo robot tuning tips
- This article was written by Professor Erich Styger for his class on embedded systems programming at the Lucerne University of Applied Sciences and Arts. It describes various ways to tweak the performance of a Zumo to be more competitive in a Mini Sumo competition. Note that his Zumos use a custom PCB rather than our Zumo shield for Arduino; our shield has a lot of capacitance in parallel with the batteries that generally prevents the “battery inertia” problem Erich describes.
- Using the L3GD20 gyroscope in control systems
- This is a YouTube playlist by control systems lecturer Brian Douglas that uses the L3GD20 MEMS gyroscope. It describes the fundamentals of the gyro and how to use it for closed and open loop control projects with MATLAB/Simulink and Arduino.
- Freedom Zumo Robot
- This robot is uses our Zumo robot kit, 75:1 micro metal gearmotors, and a Zumo reflectance sensor array. Instead of an Arduino it uses a Freescale FRDM-KL25Z as the microcontroller board, and sample code is available for line following and maze solving. By Erich, March 2013.
Why are the accelerometer readings from my LSM303D stuck at an incorrect value?
We have noticed that the accelerometer in the LSM303D is particularly sensitive to brown-out conditions. If power is removed and the voltage on the 3.3 V power supply line falls significantly, but is not allowed to drop completely to 0 V, the accelerometer can be put into a bad state. When power is reapplied to the LSM303D, the accelerometer then returns readings on some or all axes that are large values and do not change much or at all. (We have often seen readings like -32760 and 24539.)
To prevent this problem from occurring, the voltage on the 3.3 V line must be allowed to fall to about 0 V when power is removed from the LSM303D. Depending on other loads and the amount of capacitance on the 3.3 V line, it can take up to several seconds for this to happen, meaning that you should avoid interrupting power to the LSM303D for any shorter period, and if such a short interruption does occur, you should remove power again for a longer period to allow the accelerometer to reset properly.
If the voltage takes too long to fall, you can add a resistor between 3.3 V and ground (a “bleeder resistor”) to discharge the 3.3 V line more quickly when power is removed. We suggest trying a resistor in the 1 kΩ to 10 kΩ range. (Note that a stronger bleeder resistor will cause the voltage to fall more quickly when power is removed, but it will also waste more power when the supply is present.)
The Zumo 32U4 includes a bleeder resistor on the 3.3 V line.


 Pololu Zumo Shield for Arduino User’s Guide (Printable PDF)User’s manual for the Pololu Zumo Shield for Arduino.


There are no reviews yet.